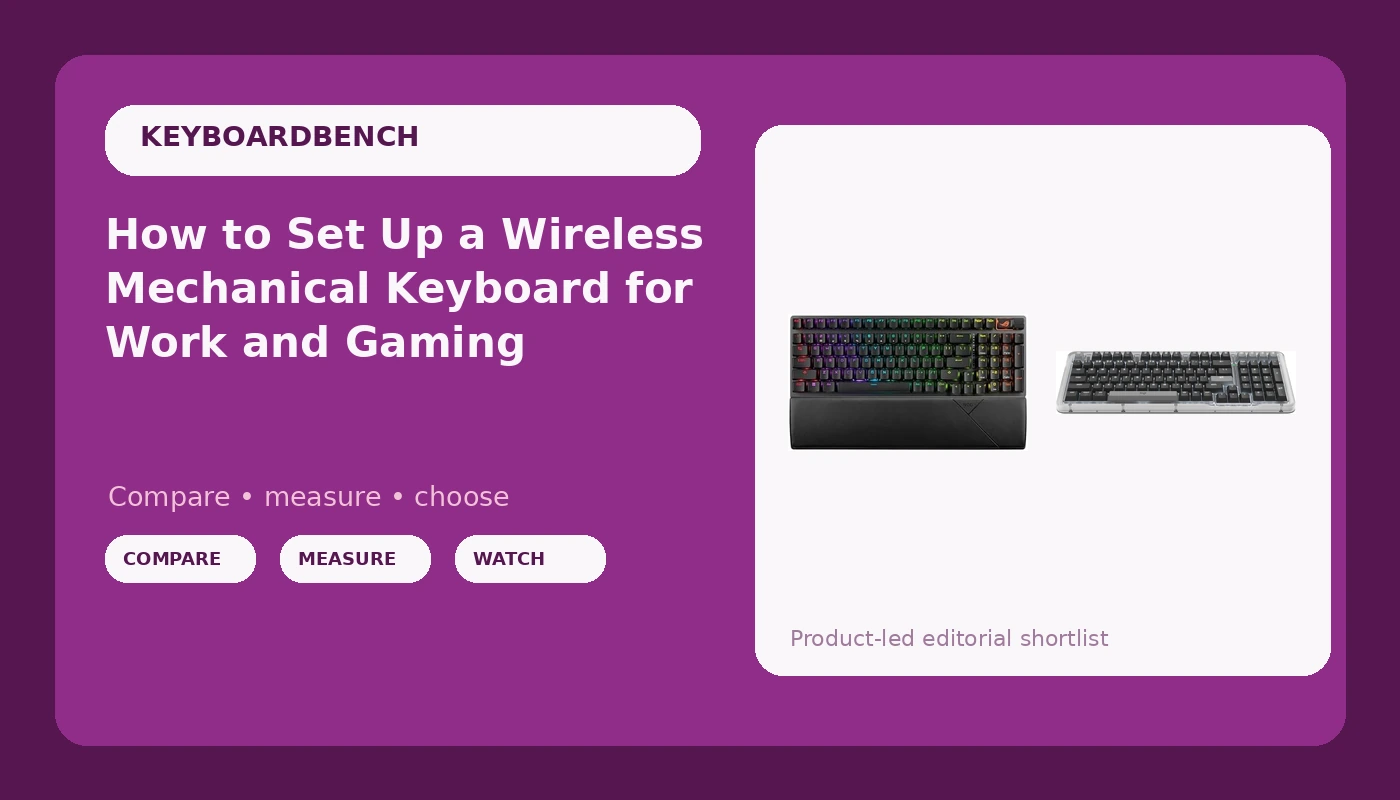
Most people set up a new keyboard by plugging it in, typing for twenty minutes, and deciding whether they like it. That is not a wireless mechanical keyboard setup. That is a first impression, and first impressions are how people end up buying three boards in a year and liking none of them.
A real setup is a sequence. You pick the layout before you unplug anything, you choose one connection and stay on it, you check the parts that fail first, and then you give the board two weeks of actual work before you form an opinion. I run that same sequence on every board that lands on my desk, whether it is a gasket-mounted 98-key or a 96% gaming board.
This guide walks through that sequence using the two wireless boards I have had in rotation lately: the ASUS ROG Strix Scope II 96, which is aimed at people who game and type on the same desk, and the Logitech Alto Keys K98M, which is aimed at people who want a softer, quieter typing feel. Both are wireless. Both keep a number pad. The checklist below works on either one.
Why you should trust me
I write software eight hours a day, and I have built 14 custom boards, which means I have spent more evenings with a switch puller in my hand than I would like to admit. I own more than 30 sets of switches and enough keycaps that my roommate negotiated a shelf treaty with me.
Every keyboard I write about gets the same treatment: two weeks of daily typing, a stabilizer rattle test on the spacebar, backspace, shift, and enter, and a blind switch comparison where I type without looking to see which board I stop noticing first. I do not review anything I have not coded on for a full work week. Unboxing is not testing.
How I picked and how I tested
These two are not the only wireless mechanical keyboards on the market. They are the two that passed a specific filter.
First, hot-swap sockets. In 2026 this is non-negotiable. A soldered board means a dead switch means a dead keyboard, and soldering is a hobby, not a requirement. The Scope II 96 ships with hot-swappable pre-lubed linear switches, so you can change the feel without touching an iron.
Second, connection flexibility. Tri-mode (2.4 GHz, Bluetooth, and wired over USB-C) is the difference between a board that lives on one desk and a board that follows you between a work laptop and a gaming PC.
Third, stabilizers. This is where cheap boards give themselves away. Rattle is the difference between a board that feels considered and a board that pings every time you hit the spacebar. I press every stabilized key at the far edge of the keycap before I type a single sentence, because that is where rattle shows up first.
Fourth, keycaps. PBT holds up. Cheap ABS shines and gets slick within months, and no amount of case quality fixes bad caps.
For testing, every board got two weeks of daily coding, the same rattle check, and a gaming session or two if it claims to be for gaming. I care about feel and sound first, layout second, and software last, because software is the part you can usually work around.
The two boards this guide is built around
These two cover the two most common reasons someone buys a wireless mechanical keyboard: they want one board that does everything, or they want one board that feels good to type on all day.
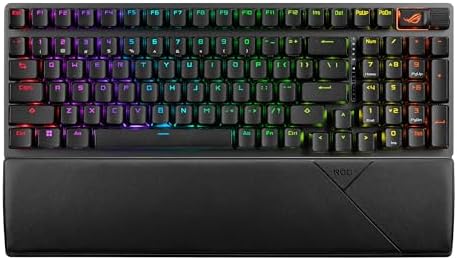
The gaming-first pick: ASUS ROG Strix Scope II 96 Wireless Mechanical Gaming Keyboard, 96% Full-Size, Tri-Mode Connectivity, Hot Swappable Pre-lubed ROG NX Snow Linear Switches, PBT Keycaps, RGB, PC/Mac Support-Black
 Visit on Amazon →
This is the board I hand to someone who says they need one keyboard for work and for games. The 96% layout keeps the number pad and the arrow cluster while cutting the dead space a full-size board wastes, so your mouse hand stops fighting the keyboard for room.
The ROG NX Snow switches are pre-lubed linears, which means they come out of the box smooth instead of scratchy, and they are hot-swappable, so the switch choice is not permanent. Pre-lubed linears are also the safest first switch for most people: no click, no tactile bump, just a consistent press.
The PBT keycaps matter more than the RGB does. PBT resists the shine that makes cheap caps feel greasy by month three, and the texture holds up under eight hours a day of typing. Tri-mode connectivity covers the whole workflow: the 2.4 GHz dongle for gaming sessions, Bluetooth for switching between a laptop and a desktop, and USB-C wired when you want zero latency and a charge at the same time.
Flaws but not dealbreakers: a 96% board still takes up real desk space, and if you never touch the number pad you are carrying keys you do not need. The RGB is there whether you want it or not.
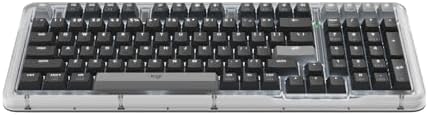
The quiet desk pick: Logitech Alto Keys K98M Wireless Mechanical Gasket Keyboard - Graphite
 Visit on Amazon →
The K98M is the board for the person who types all day and does not want to think about it. The headline feature is right there in the name: a gasket mount, which means the plate that holds the switches is cushioned rather than screwed down hard against the case. In practice that translates to a softer bottom-out and a less hollow sound, which is exactly what you want in an open office or a shared apartment late at night.
It is a 98-key layout, so you keep the number pad and the function row while shaving the extra plastic off the edges. Graphite is the right call if you want a board that disappears into a desk instead of announcing itself.
Because this is a wireless board, the setup matters more than the spec sheet. Pair it once, decide whether it lives on Bluetooth or a dongle, and keep a USB-C cable within arm's reach so a low battery is a ten second problem instead of a mid-sentence disaster.
Flaws but not dealbreakers: a gasket mount is a feel, not a promise. If you want a stiff, loud, clacky board, this is the wrong pick, and no amount of tuning will turn a soft board into a hard one.
The actual setup workflow
This sequence works on either board, and on almost any hot-swap wireless mechanical keyboard.
Step one: pick the layout before you buy. Count the keys you actually press in a day. If you use the number pad for spreadsheets, a 96% or 98-key board is the right answer and a 60% board is a mistake you will pay for twice. If you never touch the number pad, smaller is better, because every key you do not need is desk space your mouse could be using.
Step two: charge it fully before the first session. A wireless board that arrives nearly empty will drop out mid-paragraph and you will blame the connection. Plug it in, let it fill, then go wireless.
Step three: choose one connection and commit. Use the 2.4 GHz dongle if you game or if you want the most consistent latency. Use Bluetooth if you are switching between a laptop and a desktop all day. Go wired if there is already a cable running to your desk. What you should not do is leave a gaming session on Bluetooth and then wonder why the board feels off.
Step four: run the stabilizer rattle test. This is the step almost nobody does, and it tells you the most. Press the spacebar, backspace, left shift, and enter at the far edge of the keycap, not the middle. Listen for a metallic ping or a hollow knock. If it rattles, that is not a defect you have to live with. Lube the stabilizers or replace them, and the board will sound twice as expensive as it is.
Step five: set the software up once, then close it. Remap what you want, set your lighting, save the profile to the board if it supports onboard memory, and then stop opening the app. Software that wants an account to change your backlight is a design failure, not a feature.
Step six: check the keycaps. Run a thumb across the home row. If the caps feel slick rather than textured, you are dealing with ABS and they will only get slicker. PBT holds its texture, which is why the Scope II 96's PBT caps are a bigger deal than its RGB.
Step seven: type on it for two weeks before you decide. This is the rule I break for nobody. Day one opinions are about novelty. By day ten, you either stop noticing the keyboard or you keep noticing the one thing that bugs you. If you stop noticing it, it is a good board for you. If you are still fighting it after two weeks, return it, because you will not adapt.
Step eight: mod only after the two weeks. Rattle in the stabilizers means lube. A hollow sound means a tape mod or a layer of foam. A scratchy switch means, on a hot-swap board, a new set of switches rather than a new keyboard.
The competition and why it lost
The boards that did not make this guide lost for boring, practical reasons. Soldered switches took a few out of the running immediately, because a board with no hot-swap socket is a disposable board in a hobby where switches are the whole point.
Rattly stabilizers took out more. There are gaming-brand boards that ping like a cheap tray-mount case on every spacebar press, and no amount of marketing fixes a stabilizer that was never tuned at the factory.
The rest lost on layout or on software. A board that needs an account to change the lighting is a board I will not recommend to anyone who values their time. A board that drops the arrow keys to save space is a board for a very specific person.
None of this means the big names are bad. Keychron still earns its reputation in the value tier, and the budget brands keep getting better at everything except stabilizers, which is exactly where they save money. If you are shopping below these two boards, check the stabilizers the first day out of the box. That is where the savings show up.
What this all costs
I am not going to quote you a number, because prices move and a figure in a blog post is stale the week it publishes. Check current Amazon price on both boards and you will have the real numbers in about ten seconds.
What I can tell you is what the setup costs in time, because that is the part people skip:
- Twenty minutes to unbox, charge, pair, and run the rattle test.
- Another ten minutes to remap keys and set lighting once.
- Two weeks of daily typing before you are allowed an opinion.
- A tube of lubricant if the stabilizers need it, which is the cheapest upgrade in this hobby.
- The cost of buying twice if you skip hot-swap and a switch dies in year two.
The math is not really about money. It is about whether the board under your hands right now is one you stopped noticing, or one you are still negotiating with. Do the setup once, do it properly, and then get back to work.
That is the job. Your keyboard was built to be set up, not just plugged in.