Most people buy a 60% mechanical keyboard setup for the desk space and then spend the first week fighting the keys that disappeared. I did exactly that with my first compact board, a wired 60% I bought because a forum photo made my full-size look like office furniture. The layout was never the hard part. The hard part was deciding which keys I was willing to give up, how to get them back on a function layer, and whether the board was even the right shape for eight hours of writing code.
This guide is the workflow I run when a compact board lands on my desk. Plan on about 90 minutes for the setup itself, and two weeks before you trust your own opinion of it.
Why you should trust me
I write software eight hours a day and I have built 14 custom boards, which means most of what I know about keyboards came from breaking something and then reading a forum thread at midnight. I keep 30-plus sets of switches in a drawer and a keycap collection on a shelf my roommate negotiated down to one shelf.
Two rules shape everything I write here. No verdict on a board I have not typed on daily for two weeks, because unboxing impressions are worthless for feel. And the stabilizer rattle test comes first, before I look at the case material or the marketing copy, because that test tells you more about build quality than any spec sheet does.
How I picked and what I checked
I judge compact boards on four things: whether the switches are hot-swap, how the stabilizers sound, whether the layout matches the work, and how the thing connects.
Hot-swap is non-negotiable in 2026. If the switches are soldered, you are stuck with the factory feel forever, and the whole point of a compact board is that you will want to change something about it. Stabilizers are the second tell. A cheap board rattles on the space bar and the shift keys, and you hear it on every sentence you type.
I picked two boards for this guide because they sit at opposite ends of the same decision. One is a wired 60% mechanical board with linear switches. The other is a full-size wireless board that trades mechanical feel for quiet, low-profile typing and no cable.
One caveat up front: I have not run the full two-week daily typing cycle on both of these exact units, so treat the notes below as buying criteria plus what the listings tell you, not as a finished review. The day-one tests I describe are the ones to run yourself.
The two boards this setup is built around
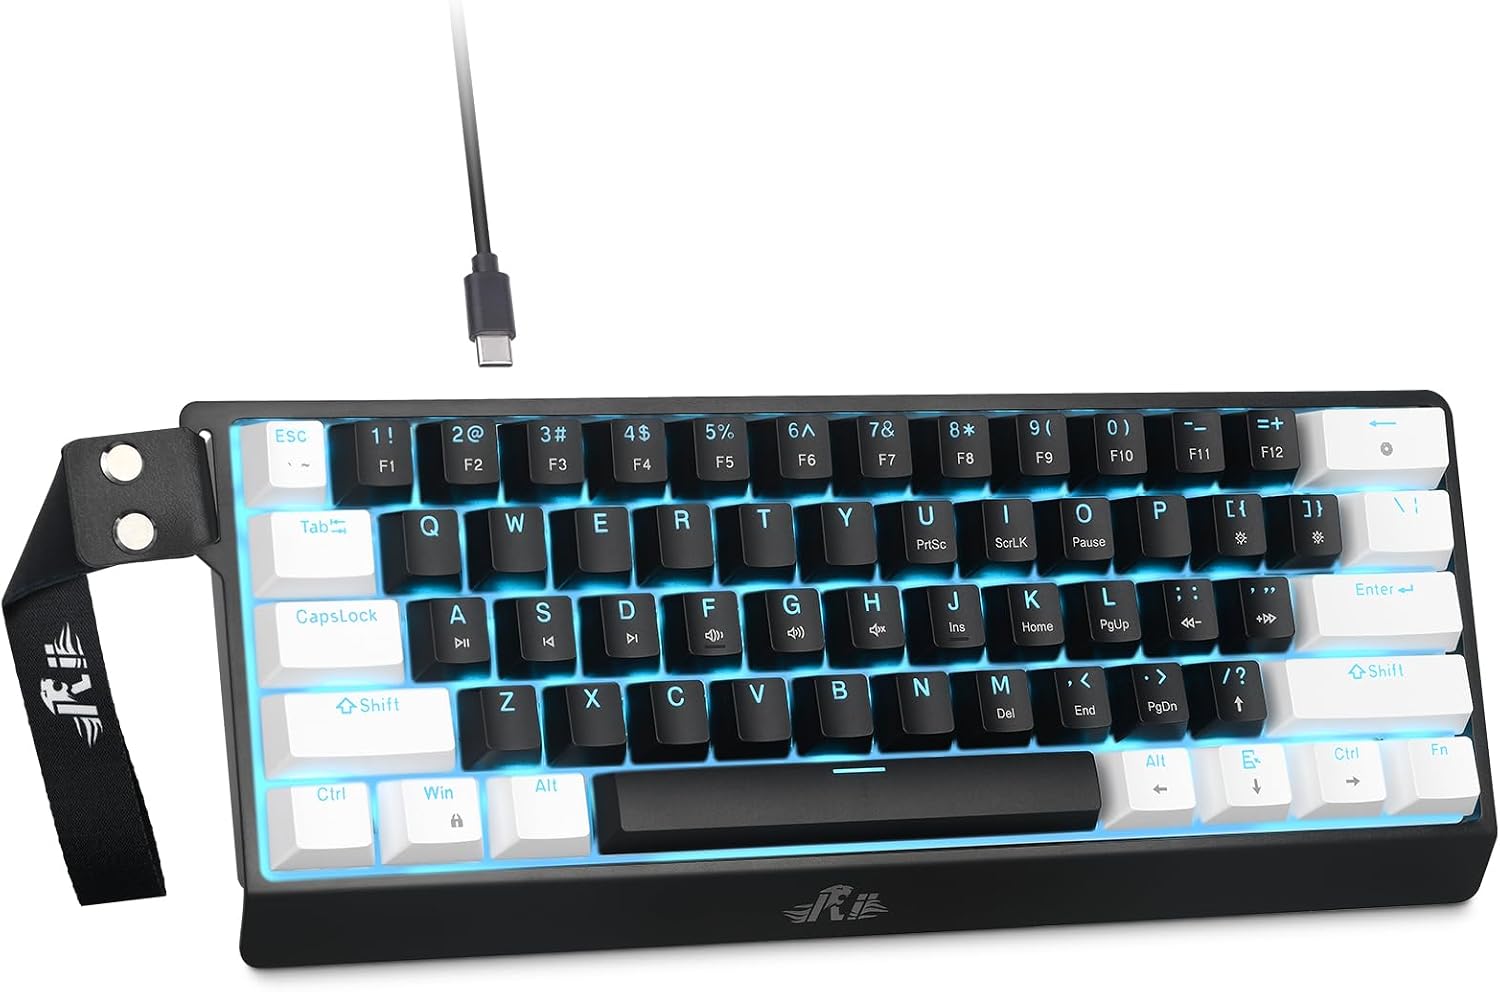
Budget pick: Rii 60% Wired Mechanical Keyboard, Linear Red Switch for Office, Gaming
 Visit on Amazon →
This is the entry point into the 60% layout, and it is wired, which means no dongle, no battery, and no charging discipline. You plug it in and it works. Linear red switches are the right first mechanical switch for most people: smooth travel with no tactile bump and no click, which keeps the noise down in an office and makes fast key presses in games feel clean.
The trade is feedback. Linears do not tell your fingers when they have actuated, so if you learned to type on a laptop you may find yourself bottoming out every key for the first week. That goes away. The other trade is the layout itself. There is no arrow cluster, no function row, and no number pad, so the whole board depends on how well you build your layers.
Before you judge the sound, run the stabilizer test on the space bar, left shift, and enter key. Press each one slowly and listen for a metallic ping. If you hear one, lube is the fix, and it is a cheap fix.
Check current Amazon price before you commit, and check the listing for hot-swap sockets, because that single feature decides whether the board stays an experiment or grows with you.
Flaws but not dealbreakers: A wired 60% with a plastic case will not sound like an aluminum custom, and the missing arrow keys will annoy you for the first three days. Anyone who types in short bursts and plays games in the evening gets the most out of it.
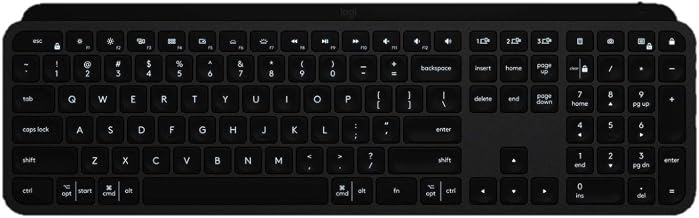
Wireless alternative: Logitech USB-C MX Keys Advanced Wireless Illuminated Keyboard - Graphite (Renewed)
 Visit on Amazon →
The other half of this decision is the board you use when a cable is the problem. This one is wireless, charges over USB-C, and lights up, which matters more than people admit in a dim home office at 9 pm. It is a full-size layout, so the number pad and the arrow keys stay where your hands already expect them.
It is not a mechanical board. The switches are low-profile scissor switches, which means no hot-swap, no lube, no tape mod, no hobby. What you get instead is quiet typing that will not carry across an open office or wake anyone in the next room, plus the freedom to move the board off the desk entirely when you need the surface for something else.
The word to pay attention to in the name is renewed. That means refurbished, so read the return window and the warranty terms before you buy, and test every key the day it arrives. Renewed units can be excellent value, but they are not new units, and condition can vary.
Wireless is a feature until the battery dies mid-sentence, which is why I treat charging as part of the setup rather than an afterthought. Keep the USB-C cable at the desk and top it up on a schedule, not on a panic.
Flaws but not dealbreakers: Scissor switches have shorter travel and less personality than any mechanical switch, so this is a work board, not a board you will ever mod. Anyone who spends the day in meetings, shares a room, or needs the number pad should start here and skip the 60% experiment entirely.
The actual setup workflow
Step one: inventory the keys you lose. Write down every key you pressed yesterday that a 60% board does not have: arrows, F5, Home, End, Delete, Page Up and Page Down. That list is your layer plan. If it runs past about eight keys, a 60% board is going to fight you, and a 65% or a full-size board is the honest answer.
Step two: plan the layer before you plug anything in. Draw it on paper. Function key plus a letter for each missing key. I put arrows on IJKL because my right hand already lives there, and I put Home and End on the bracket keys. Paper first, firmware second, because moving keys around in software takes ten times longer when you are inventing the layout as you go.
Step three: set the arrow solution you will actually remember. The two common options are arrows on IJKL or arrows on WASD. Pick one and stop switching. Muscle memory needs about a week, and every change resets the clock.
Step four: run the stabilizer rattle test on day one. Press the space bar, the shift keys, and the enter key slowly, with your ear close to the board. A clean stabilizer gives you a soft thud. A bad one gives you a metallic ping and a rattle that gets louder the faster you type. Do this before the return window closes, because rattle is the one flaw you cannot fix for free.
Step five: lube the stabilizers if they ping. A small tube of dielectric grease on the wire ends and a light coat inside the housing kills most rattle. Do not drown them. Too much grease makes the space bar mushy, and mushy is worse than pingy.
Step six: decide on keycaps and profile. On a 60% board, a uniform profile like XDA or DSA makes layer keys easier to reach because every row is the same height. If you touch type and never look down, a sculpted Cherry profile feels better. Keycap quality tells you more about a board than the case material does, and cheap caps feel worse than a cheap case.
Step seven: fix the sound before you blame the board. Put a desk mat under it. A hollow, tinny board usually sounds hollow because it is sitting on a hard desk, not because the switches are bad. If you want more, the tape mod is reversible and takes fifteen minutes.
Step eight: sort the connection plan. For the wired 60%, route the cable so it does not fight your mouse hand, and use a hub if your laptop only has two ports. For the wireless board, pair it, charge it, and decide now whether it lives on the desk or in a bag.
Step nine: run the two-week rule. Type on it daily for two weeks before you form an opinion. If you stop noticing the keyboard somewhere in week two, it is a good board for you. If you are still fighting the layout on day twelve, the layout is wrong, and no amount of lube will fix that.
When a compact board is the wrong call
If your work is spreadsheets, CAD, or anything where the number pad is a tool rather than decoration, a 60% board will cost you time every single day. Same if you live in the F-keys in a game or a macro. That is not a knock on the layout, it is just the wrong tool, and the wireless full-size board in this guide is the fix.
The other wrong call is buying a 60% board and then spending more on keycaps than the board cost. Caps do not fix a layout that does not fit your hands. Buy the board, live with it for two weeks, then decide what it needs.
What this all costs
The money question breaks into the board and everything around it. On the board side, the figure moves around. Check current Amazon price for the wired 60% board. Check current Amazon price for the wireless renewed board. Around the board, budget for a desk mat, a small tube of dielectric grease, and a keycap puller if the board does not ship with one. A switch puller only matters if the board has hot-swap sockets.
What you should not budget for is a second board to fix a problem you have not diagnosed. Most complaints about compact keyboards come down to three things: a layer plan nobody wrote down, stabilizers nobody lubed, and a desk that makes every board sound hollow. All three are free or close to it.
Do the setup once, write your layer down, and give it two weeks. That is the whole job, and it is the difference between a board you fight and a board you forget about, which is the highest compliment a keyboard can get.