Most people set up a wireless mechanical keyboard in about ninety seconds. Open the box, hold whatever key looks like it pairs, click the device name in the Bluetooth menu, start typing. Then three weeks later they are back inside the return window because the board drops keystrokes when the microwave runs, the layout fights their muscle memory, and the space bar sounds like a shopping cart on gravel.
A wireless mechanical keyboard setup that survives a full work week is a sequence, not a single step. You choose a connection mode, you pair in the right order, you program the board instead of the operating system, and you deal with the stabilizers before your hands learn them. That is the entire job, and it fits in one evening.
I write code eight hours a day on whatever board is sitting on my desk, and every board gets the same two-week trial before I form an opinion. Below is the order I run, plus the two wireless boards I would hand a beginner who wants programmability without turning the hobby into a second job.
Why you should trust me
I have built 14 custom boards and I own more sets of switches than any reasonable person should. I test every keyboard the same way: two weeks of daily typing on real work, a stabilizer rattle check with the board flat on a desk, and a blind switch comparison where I type with my eyes closed and try to describe the feel before I look at the label.
That routine exists because switch feel is personal and "best" is meaningless until I know whether you type or game. My biases are on the table: Keychron is the best value brand in the hobby right now, hot-swap is non-negotiable in 2026, and stabilizer rattle tells you more about build quality than the case material ever will.
What has to be true before you set anything up
Four things decide whether a wireless board works for real work. If a keyboard misses any of them, the setup steps below will not save it.
It has to be programmable on the board. Remapping keys in Windows or macOS means your layout dies the moment you plug into a different machine. Programming the board itself means your layout follows the keyboard.
It has to hold a connection for a full workday. Wireless is a feature until the battery dies mid-sentence. I treat battery life the same way I treat switch feel: as a spec that only matters after a week of real use.
It has to fit the desk you actually have. A full-size board with a number pad is the right call for spreadsheets and the wrong call for a small desk with a mouse you swing wide. Decide that before you order, not after.
The switch has to survive eight hours. Silent linears are the safest first choice for an office or a shared apartment. Tactiles are more fun and louder. Clicky switches are a personality choice, and your roommates will have opinions.
How I picked these two
Both boards here are wireless, both run QMK or VIA, and neither locks basic functions behind a vendor app. That combination is the whole reason I recommend them: you can pair, remap, and switch machines without ever installing software you do not want.
I also looked for standard layouts. Custom keycap profiles and weird bottom rows are fun once you know what you like, and miserable as a first board because every replacement set becomes a scavenger hunt.
The tiebreaker was the switch and the layout, which is where the two picks split. One is compact and gives you hardware controls on the board. The other is full-size and ships with a quiet linear switch, which is the closest thing to a default answer for shared spaces.
The two boards worth setting up
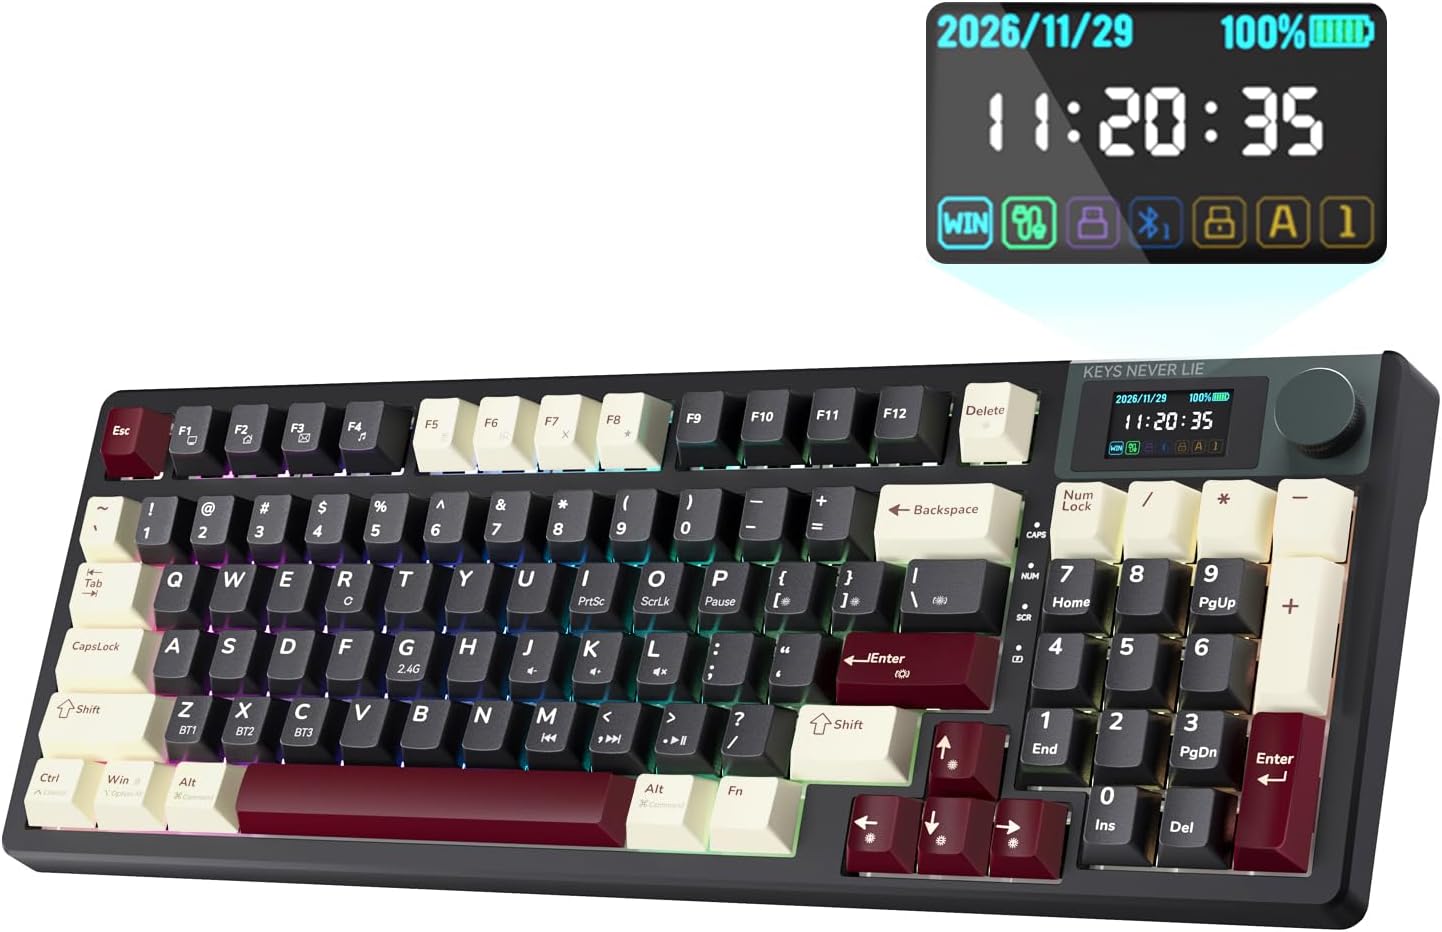
Budget pick: KEMOVE K94 Wireless Mechanical Keyboard, QMK/VIA, LCD Screen & Metal Knob
 Visit on Amazon →
The K94 is the board I point people at when they want wireless and programmability without giving up desk space. The LCD screen and the metal knob are the two features that earn their place after week one. The screen tells you what you need to know without software: which connection you are on, what layer is active, whether the battery is about to embarrass you in the middle of a paragraph.
The knob is the part I did not expect to care about. Once you map it in VIA, it becomes volume, scroll, or a zoom control depending on the layer, and it stops being a gimmick the first time you use it without looking down. QMK and VIA support means your remaps live on the board, so the layout survives when you switch from a work laptop to a personal machine.
Flaws but not dealbreakers: A screen and a knob are extra things that can develop quirks, and a compact layout means a learning curve for anyone who lives on the number pad. Give it the full two weeks before you decide.
Anyone with a smaller desk, a laptop that moves between rooms, or a preference for hardware controls over software menus should start here.
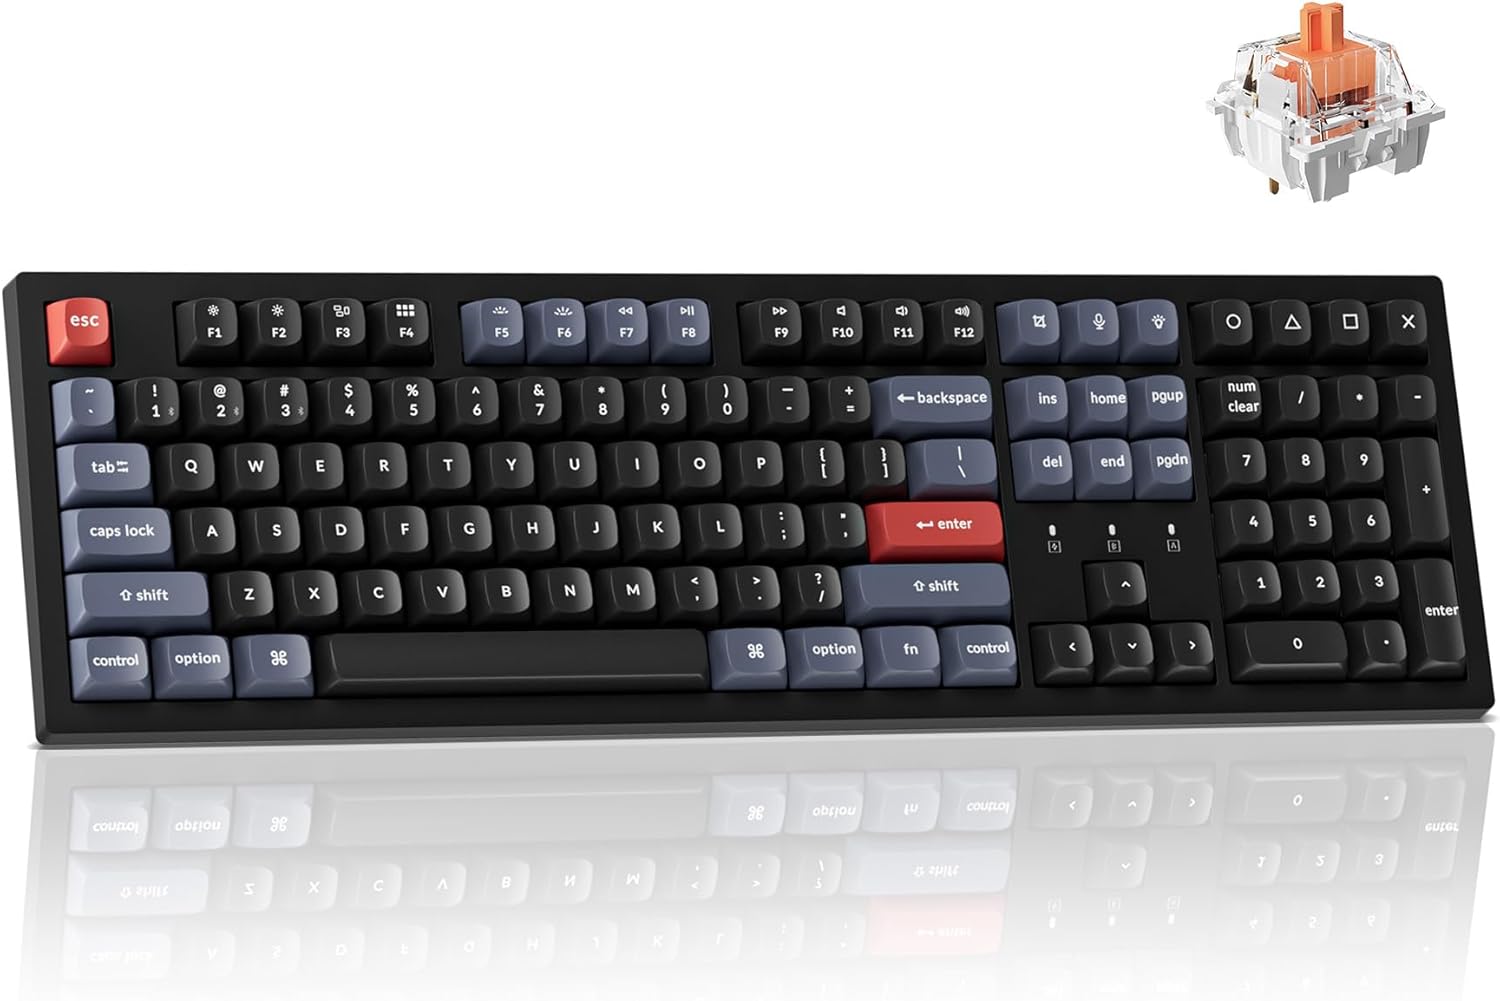
Full-size pick: Keychron K10 Pro Wireless Custom Mechanical Keyboard, QMK Programmable Bluetooth 100% Layout with Silent Red Switch White Backlight Compatible with Mac Windows Linux
 Visit on Amazon →
The K10 Pro is the boring answer in the best sense. A 100% layout means the number pad is where your fingers already expect it, and for anyone doing spreadsheet work or heavy data entry, that alone ends the debate. Keychron's K series is the best entry point in the hobby, and the Pro version adds QMK programmability to the formula.
The Silent Red switches are the reason I put this one in front of people who share a room or an office. They are linear, they are quiet, and they do not announce every sentence to the person across the table. White backlight instead of a rainbow is a small thing that matters more than people admit: it is readable in a dark room without turning your desk into a light show.
The Mac, Windows, and Linux compatibility line is not marketing filler. If you run two operating systems, the board's own layout layers handle the modifier swap, and you stop rebinding Command and Control every time you switch machines.
Flaws but not dealbreakers: Full-size boards eat desk width, and a quiet linear switch will feel flat to anyone who wants a tactile bump. Neither is a defect, but both are worth knowing before you order.
Anyone who wants the number pad, types next to other people, and would rather not think about their keyboard again for two years should buy this one.
The setup workflow, in order
Step one: charge the board fully before you pair anything. A board that browns out mid-pairing can land in a strange state where it advertises a connection it will not hold. Plug it in, let it fill, then start. This one habit prevents most of the "my keyboard keeps disconnecting" threads I read every week.
Step two: pick your connection mode and commit to it for the first week. Wireless boards typically offer more than one option, and switching back and forth during setup makes it impossible to tell which mode is causing a dropout. Pick one, run it for seven days, and only then test the alternative.
Step three: pair from the operating system, not from a utility. Put the board in pairing mode using the key combo in its manual, then add it through your computer's own Bluetooth settings. Third-party dongle managers and manufacturer utilities add a layer that can silently grab the device and route input somewhere you did not intend.
Step four: assign your device slots on purpose. Wireless boards remember multiple machines. Map the first slot to the work laptop and the second to the personal desktop, then label them in your head. When you switch machines, you want one key combo, not a trip into a settings menu.
Step five: remap the layout on the board. Open VIA in a browser, connect, and move the keys you actually use. Caps Lock to Escape, a dedicated screenshot key, a layer for arrow keys if you are on a compact layout. Because the remap lives on the board, it applies to every machine you pair it with, including the one you cannot install software on.
Step six: check the stabilizers before your fingers memorize the sound. Tap the space bar, both shifts, Enter, and Backspace off-center. A metallic ping means the stabilizer wire is loose or dry. Lube is the cheap fix for almost everything that sounds wrong, and it takes twenty minutes. If you would rather not open the board, this is the moment to decide, while the return window is still open.
Step seven: drop the backlight to the lowest level you can read. Backlight is the single biggest battery drain on any wireless board. If you work in a lit room, turning it down costs you nothing and buys you days between charges.
Step eight: fix wake behavior in the operating system, not the keyboard. If the board takes a second to respond after idle, the culprit is usually the computer's Bluetooth power management. Adjust the sleep settings there before you blame the firmware.
Step nine: live with it for two weeks. Type on it for a full work week and then another. If you stop noticing the keyboard, it is good. If you are still thinking about the space bar on day twelve, that is your answer too.
Caveats that bite after week one
Wireless does not work before the operating system loads. BIOS screens, boot menus, and disk encryption prompts generally need a wired connection. Keep one cable on the desk. This is the number one complaint I see from people who go fully wireless and then need to change a boot order.
USB 3 hubs and 2.4 GHz wireless can fight each other. If you get occasional dropped keystrokes, move the receiver or the board away from a hub full of drives before you return anything.
Firmware updates can wipe your layers. Back up your layout in VIA before you flash. Rebuilding a layout from memory is a twenty-minute chore you only do once.
Keycaps are where the money quietly goes. A set that costs more than the board is a hobby purchase, not a setup requirement. The stock caps on both boards are fine to start.
Mistakes that make people return a good board
The most common one is judging a keyboard on day one. Switch feel changes after a week of typing, and so does your opinion of it. The second is remapping in the operating system and then wondering why the layout resets on a different machine. The third is ignoring stabilizer rattle until it is the only thing you hear.
The fourth is buying for a desk you do not have. A full-size board is the correct choice for number-heavy work and the wrong choice for a narrow desk, and no amount of firmware fixes geometry.
What this actually costs you
The setup itself is free. Charge the board, pair it, open VIA, move a few keys, and you are done inside an hour. The optional spend is a small lube kit for the stabilizers and a spare cable, both of which are one-time purchases that carry over to your next board.
For the boards themselves, check current Amazon price on each: the KEMOVE K94 for the compact, hardware-control route, and the Keychron K10 Pro for the full-size, quiet-switch route. Over two years, the cost per workday on either is small enough that the deciding factor should be layout and switch, not the sticker.
The two-week trial is the real investment. It costs you nothing but patience, and it is the only way to know whether a board disappears under your hands or keeps announcing itself.
The bottom line
Charge it, pair it once in the right slot, program the board instead of the computer, fix the rattle early, and dim the backlight. That is a wireless mechanical keyboard setup that holds up past the honeymoon week. Pick the layout that matches your desk, pick the switch that matches your room, and then give it two weeks of real work before you judge it. That is the whole test.