A budget hot-swap mechanical keyboard is the cheapest honest way into this hobby. Hot-swap means the switches pull out with a tool and push back in without a soldering iron, so the board you buy this month can sound completely different next month for the cost of a switch set. The two boards this guide is built around cover the two real entry points in 2026: a compact wired 60% and a wireless 75% with hot-swap sockets, RGB, and three ways to connect.
Most of what makes a cheap board feel cheap is not the switches. It is the stabilizers, the case resonance, and the angle it sits at on your desk. All three are fixable in an afternoon with a screwdriver, a small brush, and a tube of dielectric grease. This is the order to do it in.
Why this workflow is worth your afternoon
I write code eight hours a day, which means whatever board sits under my hands gets a real workload instead of a five minute first impression. The checklist below is the one I run on any board that lands on my desk, and it stays the same whether the board cost a little or a lot, because the failure points are identical. Cheap boards do not fail at the switch. They fail at the stabilizer, the plate, and the firmware, and two of those three are things you can fix yourself.
The rule I use: type on a board for a week before you decide anything about it. If you stop noticing the keyboard, it is doing its job. If you keep hearing a metallic ping every time you hit the spacebar, that is not a personality trait of the board, that is a tune you have not done yet.
What hot-swap actually changes
A hot-swap socket is a small metal clip soldered to the PCB instead of a switch soldered directly to it. You get a plastic puller in the box, you squeeze it around a switch, and it pops out. That is the whole trick.
It changes three things for a beginner:
- You can try switch types without buying a new board. Linears, tactiles, and clickies feel nothing alike, and no review can tell you which one you will want after a week of typing.
- You can fix a dead switch in thirty seconds. On a soldered board, one dead key means a soldering iron or a new keyboard.
- You can resell or reuse the switches. Switch sets hold value far better than boards do.
Two details matter when you shop. Most sockets accept both 3-pin and 5-pin switches, but confirm it on the listing before you buy a switch set, because a 5-pin switch with the two plastic legs still attached will not seat in a 3-pin-only board without clipping them. The second detail is socket direction, north-facing or south-facing, which mostly matters if you plan to run thick Cherry-profile keycaps. Neither of these is a dealbreaker, they are just things to check before you spend money on switches.
The two boards this guide is built around
The workflow below works on any hot-swap board, but these are the two I would point a beginner at, one wired and one wireless.
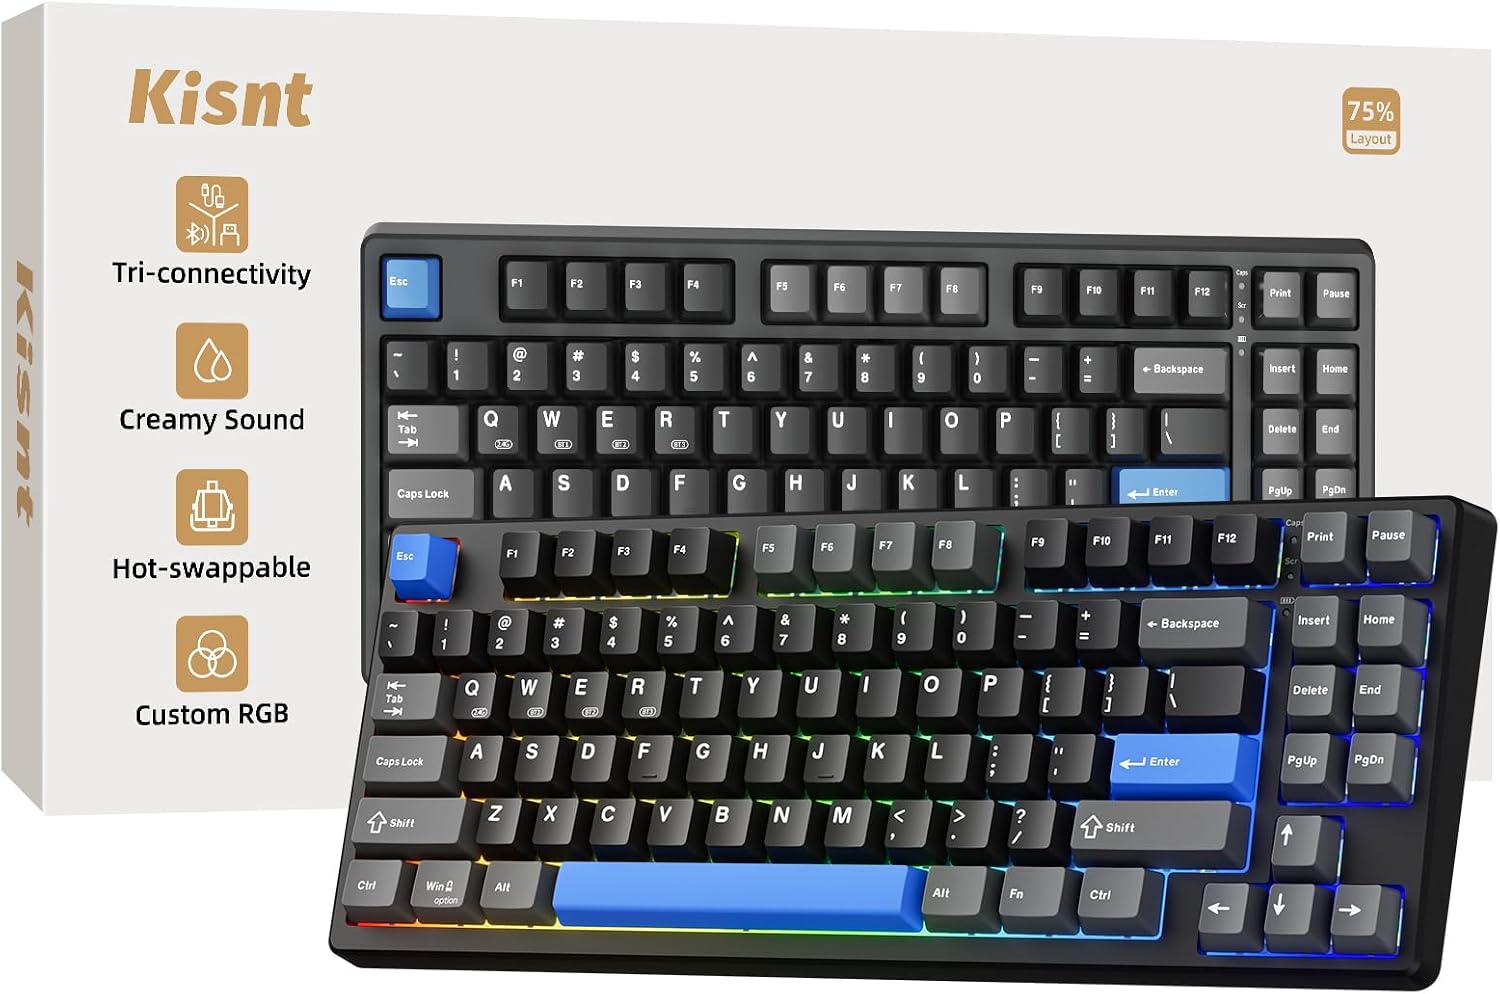
Our pick: Kisnt KN85 Wireless Mechanical Keyboard, 75% Layout, Bluetooth/2.4GHz/USB-C, Custom RGB Backlit, Hot-Swappable Linear Switch, Creamy Sound for Gaming/Typing (Textured Black)
 Visit on Amazon →
The 75% layout is the reason this one is my pick for a first board. You keep the function row, the arrow keys, and the delete and page keys, and you lose the numpad you were not using anyway. That means no layer memorization on day one, which is where most people give up on a 60%.
The spec list is the short version of what to look for: hot-swap sockets, linear switches, three connection modes (Bluetooth, 2.4GHz wireless, and USB-C wired), and per-key RGB. The textured black finish is a small thing that matters more than it sounds, because smooth glossy plastic on a keyboard shows every fingerprint within a week.
The wireless modes are where a beginner should be careful. Bluetooth is fine for typing on a laptop and terrible for anything latency-sensitive, and the 2.4GHz dongle is the mode you want for gaming. Wired USB-C is the mode you want when the battery is low and you do not want to think about it. Use all three as the situation calls for it rather than picking one and staying loyal.
Flaws but not dealbreakers: Wireless means a battery, and batteries are the one thing on a keyboard you cannot fix with lube. Also, the "creamy sound" in the product name describes a stock tuning that is better than most budget boards but still benefits from the stabilizer work below.
Anyone who wants one board for work, gaming, and a laptop that moves between rooms should start here.
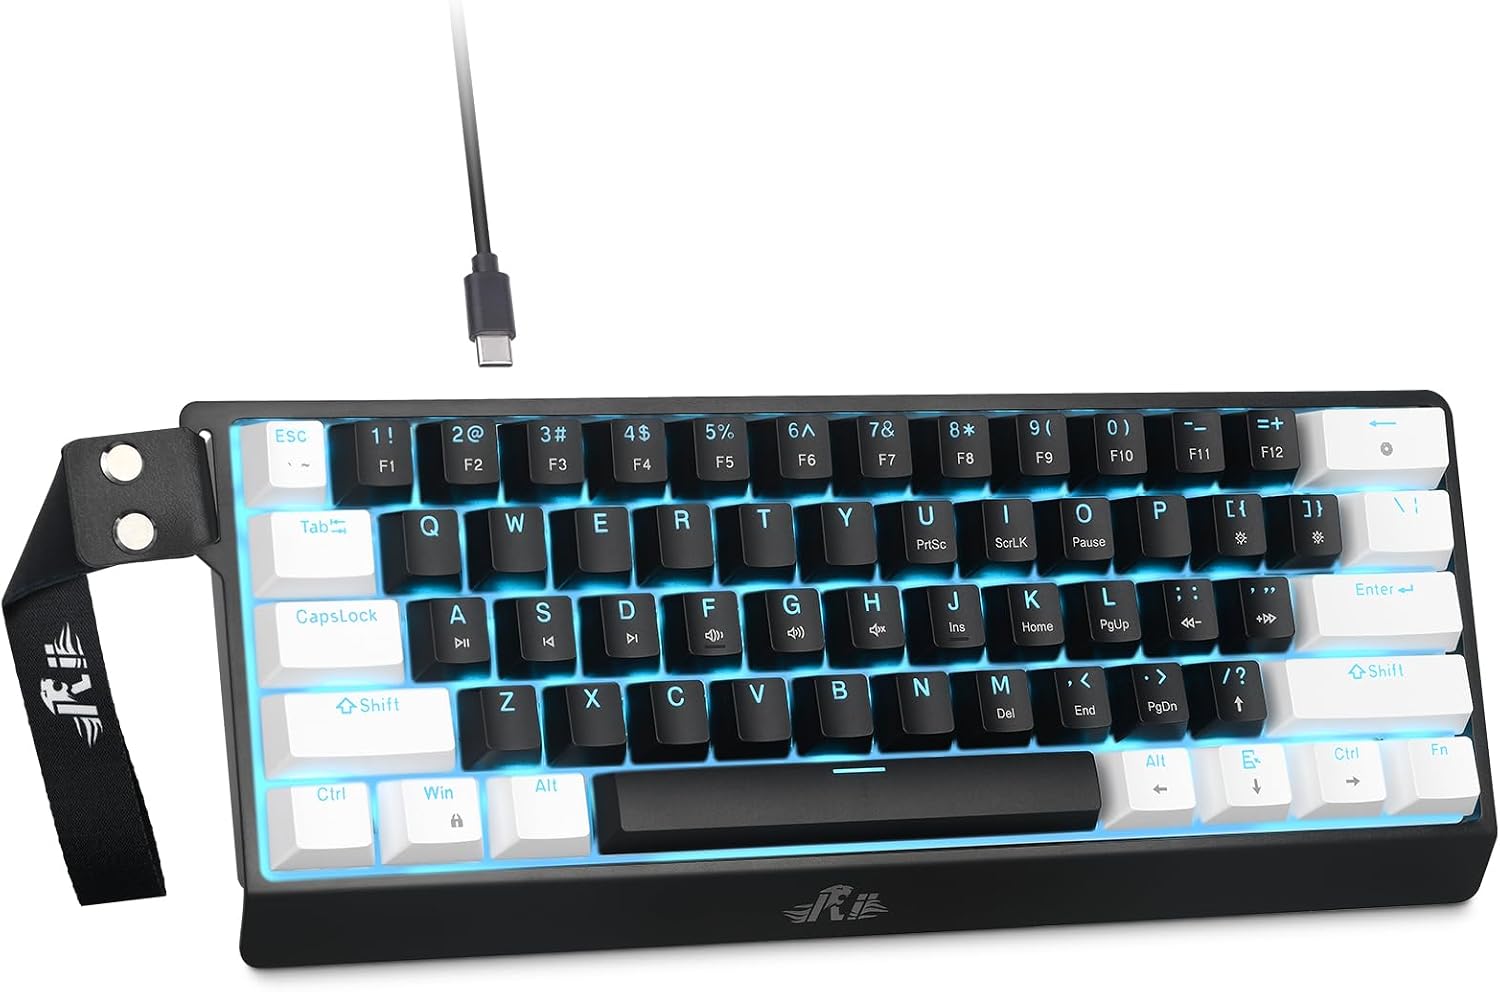
Budget pick: Rii 60% Wired Mechanical Keyboard, Linear Red Switch for Office, Gaming
 Visit on Amazon →
This is the smallest board in the pair and the least expensive way to find out whether you actually like typing on a 60%. Red linear switches are the standard beginner linear: light actuation, no bump, no click, quiet enough for an open office. The layout drops the arrow keys and the function row into a function layer, which is either the best decision you make or the reason you return it, and there is no way to know which until you have typed on it for a few days.
Be honest about what this board is. The name advertises a wired 60% with linear red switches, and it does not advertise hot-swap sockets, so treat it as a fixed-switch board unless the listing says otherwise. That is the trade: you save money and give up the ability to change switches later. For someone who just wants a small, quiet, wired board for an office desk, that is a fine trade. For someone who wants to experiment with switch types, step up to the 75% above.
The 60% form factor also has a practical benefit beyond desk space: your mouse hand travels less, because the board ends right where the arrow cluster would normally start. If you game with a low sensitivity and a big mousepad, that matters more than you would guess.
Flaws but not dealbreakers: No wireless, no hot-swap, and the function layer takes a week to internalize. Also, a 60% board with a long USB cable has a habit of sliding on a smooth desk, so budget for a desk mat.
Anyone on a tight budget, or anyone who wants a dedicated wired board for one desk and does not plan to mod it, will be happy here.
Before you start: what to have on the desk
You do not need much, and none of it is expensive:
- A small Phillips screwdriver that actually fits the screws. A too-large driver strips heads.
- A switch puller, which usually comes in the box with a hot-swap board.
- Dielectric grease, the kind sold for automotive connectors, for the stabilizers.
- A small brush or a clean paintbrush for dust.
- A desk mat, if your desk is glass or smooth laminate.
- A keycap puller, separate from the switch puller, so you do not scratch caps.
The one thing you should not buy yet is a switch set. Decide that after a week of typing, not before.
The setup workflow, step by step
Step one: Type on it stock for two days. Not two hours. Two days. You need to know the baseline before you change anything, otherwise you will not be able to tell whether your work helped or hurt. Note which keys feel different, and whether the board slides.
Step two: Pull the keycaps off the stabilizer keys. Spacebar, both shifts, enter, and backspace. Take a photo before you pull, because putting a spacebar back together with the wire in the wrong orientation is the most common beginner mistake.
Step three: Check the stabilizer rattle. Press the bare stabilizer stem down slowly and let it come back up. A metallic ping or a hollow tick means the housing is loose in the plate or the wire is dry. This is the single best predictor of how a budget board will feel long term, and it is the thing cheap boards all get wrong.
Step four: Lube the stabilizers. A thin coat of dielectric grease on the wire where it contacts the housing, and a small amount inside the housing where the stem slides. Do not drown it. Too much grease makes the key mushy and slow to return, which is worse than rattle.
Step five: Put the keycaps back and listen again. The difference should be obvious on the spacebar first, because it is the longest wire and the loudest offender. If it still pings, the housing is loose in the plate, and a strip of tape on the back of the stabilizer housing will tighten it.
Step six: Set your typing angle. Flip out the feet if the board has them, or leave it flat. Flat is generally better for your wrists and slightly better for sound, because a raised back edge makes the case resonate more. Try both for a day each.
Step seven: Pair the wireless modes in order. On a three-mode board, pair Bluetooth first, then the 2.4GHz dongle, then leave the cable plugged in for charging. Label which device is on which Bluetooth slot if the board supports multiple, because forgetting which slot is which is the most common wireless complaint.
Step eight: Change one thing at a time after that. Switches, then keycaps, then foam inside the case. Changing everything at once means you never learn what actually made the difference, and you will undo a good change by accident.
Where budget boards cut corners
The money comes out of three places, and knowing them tells you what to fix first.
Stabilizers. This is the number one cost cut. It is also the cheapest fix, which is the good news.
Keycaps. Thin ABS caps sound hollow and shine up within months. A decent PBT set is the second best upgrade after the stabilizer tune, and it usually costs less than a switch set.
Case foam and mounting. A hollow case is a sound problem, not a feel problem, and a layer of foam or even shelf liner inside the case tames it. Do not expect a budget board to sound like a board with a gasket mount and a metal case, because the mount is the expensive part and it is not something you can add later.
Firmware and software. If the RGB software demands an account to change a color, that is a real annoyance and there is nothing to fix. Set your lighting once and move on.
Wired or wireless for a first board
Wireless is a feature until the battery dies mid-sentence, which is why the honest answer is that both boards here have a place.
Take the wireless 75% if the board moves between a desk, a couch, and a laptop bag. Take the wired 60% if the board lives in one spot and you would rather never think about charging. If you game seriously, use the 2.4GHz dongle on a wireless board rather than Bluetooth, and plug in the cable when you are doing long typing sessions so the battery is not a variable.
The best of both is a wireless board used wired most of the time, with the radio as a convenience rather than a requirement.
What this all costs
There are two tiers here and the difference is not just the price on the listing.
The wired 60% is the entry tier: one purchase, no accessories, no hot-swap, no battery. The wireless 75% is the tier above it, and what you pay for is the hot-swap sockets, the three connection modes, and the layout that does not force you to learn a function layer on day one.
After that, the ongoing spending is optional and small. Dielectric grease costs less than a lunch. A PBT keycap set is the biggest optional expense and the one with the most obvious payoff. A switch set is the last thing you should buy, after you have typed on the stock switches long enough to know what you dislike about them.
The math that matters is not the price of the board. It is whether the board is still on your desk in two years. A cheap board with a stabilizer tune and a good keycap set gets you most of the way to a board that costs several times as much, and the work takes one afternoon.
That is the job. Start with the stabilizers, work outward, and change one thing at a time.