Most people shopping for a wireless hot-swap mechanical keyboard end up choosing between two frustrating options: a 60% board that looks incredible in photos and fights you every time you need an arrow key, or a big plastic gaming board with a volume knob and stabilizers that rattle like a shopping cart with a bad wheel. The budget tier has gotten genuinely good, but "good out of the box" and "good on your desk" are two different things.
I am Theo. I write software in Austin, I have built 14 custom boards, and I own more sets of switches than I have shelf space for. The two boards in this guide are a 100-key wireless gasket board with a knob and a huge battery, and a 60% tri-mode board with QMK and VIA support. Both are hot-swap, both are wireless, and both need about an hour of setup before they earn a permanent spot on your desk.
Here is the exact order I do that setup in.
Why you should trust me
I type on whatever board is being reviewed for eight hours a day, minimum two weeks, before it gets a recommendation on this site. Unboxing is not a review. A board that feels fine in the first ten minutes can be a board you resent by day nine, and the only way to find that out is to keep typing on it.
The checks I run are boring and repeatable. Can I code on it for a full work week without reaching for a different board? Do the stabilizers rattle when I tap the spacebar in a quiet room? Are the switches hot-swap, because soldering is a hobby and not a requirement in 2026? And does the wireless hold up, or does the battery die mid-sentence and force me to dig out a cable?
That is the whole test. No bench, no lab coat, just a lot of typing and a lot of listening.
How I chose these two boards
The filter for this guide was narrow. A board had to be hot-swap, had to run wireless with a wired fallback, had to use a gasket mount rather than a stiff screwed-down plate, and had to sit in the budget tier where most people actually shop. That knocked out a lot of flashy options, including several gaming-brand boards that look the part and sound like a tin can.
The two that survived represent the two real answers to the layout question. If you use a number pad, function row, and arrow keys daily, you want the 100-key board. If you mostly type prose and code and you want desk space back, you want the 60%. There is no universal right answer here, and anyone who tells you there is has not watched a developer try to hit Alt+F4 on a 60% without layers.
One thing I will say up front: keycap quality tells you more about a budget board than the case material does. Cheap caps feel worse than cheap plastic. When you unbox either of these, put your fingers on the caps before you judge anything else.
The two boards worth setting up
Both of these sit in the same budget tier, which means the decision is about layout and firmware, not about which one is "better."
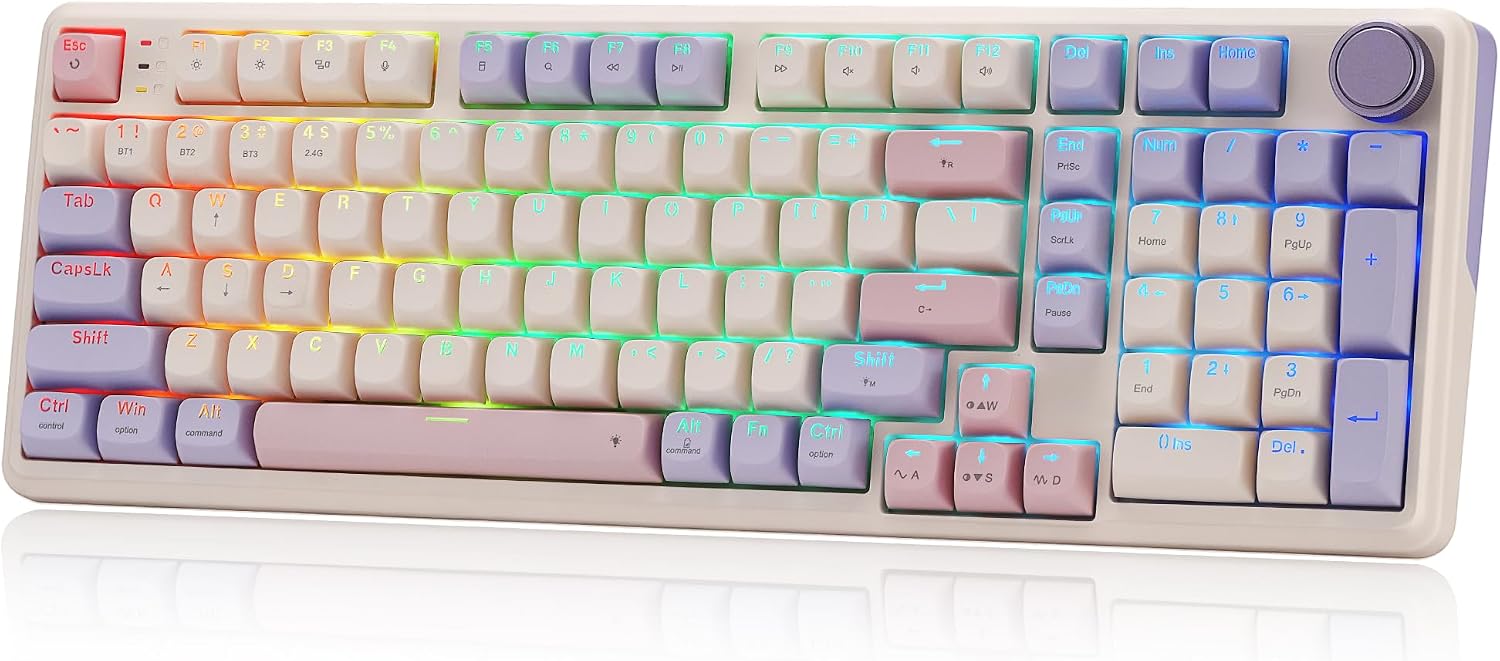
The daily driver pick: Redragon K768 PRO Wireless 100-Key Gasket Gaming Keyboard, Knob + 8000mAh
 Visit on Amazon →
This is the board for someone who does not want to think about layers. You get the full 100-key layout, which means a number row, function row, arrow cluster, and a knob you can assign to volume or whatever else you actually use. The gasket mount is the interesting part at this price, because a gasket mount changes the feel of every keypress: the plate floats on soft material instead of being bolted down, so bottoming out feels cushioned rather than hard.
The 8000mAh battery is the number to pay attention to if wireless runtime is your priority. A cell that size is unusual in the budget tier, and it is the difference between charging once a month and charging once a week.
Flaws but not dealbreakers: A 100-key board takes up real desk space, and the knob is one more thing to configure. If you have a small desk or you move between a laptop and a desktop constantly, the compact board below will suit you better.
Anyone who lives in spreadsheets, code editors, or games with a number pad will get the most out of this one.
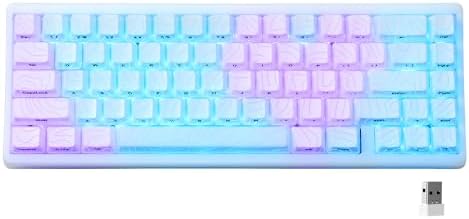
The compact pick: HITIME x XVX M67 Wireless 60% Percent Keyboard, QMK/VIA Topographic Gaming Keyboard, Tri-Mode Thocky Creamy Mechanical Key Board, Hot Swappable Gasket Mount RGB IMD Tech for Win/Mac(JadeStone)
 Visit on Amazon →
This is the one for people who want to remap everything and reclaim desk space. The 60% layout drops the number pad, function row, and arrow cluster, and gives you layers instead. That sounds like a downgrade until you spend a week with QMK or VIA and realize you can put the arrow keys exactly where your right hand already rests.
QMK and VIA support is the headline feature here, because it means you configure the board in a browser instead of installing a vendor utility that wants an account before it will let you change an RGB color. Tri-mode means 2.4GHz, Bluetooth, and wired, so it will follow you between a desktop, a laptop, and a tablet. The gasket mount and hot-swap sockets are both present, which is what makes this a project board rather than a disposable one.
The JadeStone colorway is a look, and the topographic design on the case is the kind of thing you either love immediately or do not. Either way, it is a 60% with real firmware behind it, and that is rarer in this tier than it should be.
Flaws but not dealbreakers: A 60% has no dedicated arrow keys until you build layers for them, and the first two days with a new layer map are genuinely annoying. Budget-tier stabilizers on a compact board also tend to be the first thing you notice, so plan on the rattle check below.
Anyone who types more than they game, and who wants a board they can reprogram without opening a soldering iron, should start here.
The setup workflow, step by step
This is the part that separates a board you tolerate from a board you like. Do these in order.
Step one: Charge it fully before you pair anything. Wireless boards ship with a partial charge, and pairing a board at 12% is how you end up troubleshooting a Bluetooth connection that was never the problem. Plug it in over USB-C, let it fill, then unplug and start.
Step two: Choose your connection mode on purpose. Both boards are tri-mode, which means you have three real options. Use the 2.4GHz dongle if the board lives on one desktop and latency matters. Use Bluetooth if you want to jump between a laptop, a desktop, and a tablet without moving a dongle. Use wired when you are charging or when you want the connection to be one less variable while you diagnose something else.
Step three: Set up the layout before you set up the lighting. On the M67, that means opening VIA in a browser and building your layers: arrows on a second layer, function keys on a third, and media controls somewhere your left hand can reach. On the Redragon, the 100-key layout already gives you the arrows and the function row, so your remapping work is mostly deciding what the knob does.
Step four: Run the rattle test. This takes thirty seconds and tells you more about build quality than any spec sheet. Turn the board off, put it on your desk, and tap the spacebar, both shifts, enter, and backspace. Listen for a metallic ping or a hollow buzz. A tiny bit of noise is normal. A ringing spacebar is not.
Step five: Lube the stabilizers if they rattle. This is the highest-value mod on any budget board. Pop the spacebar and the shift keys off with a keycap puller, and put a small amount of dielectric grease where the wire meets the housing and a light coat along the wire itself. Small amount. Too much grease turns a rattle into a mushy, sluggish key that never comes back up cleanly.
Step six: Check the hot-swap sockets. Pull one switch with a switch puller and look at the pins, then seat it back in. Straight pins seat with a soft click. Bent pins are the number one cause of a dead key on a brand new hot-swap board, and it is almost always a shipping problem, not a defect in the board. Straighten the pin with your fingers and reseat it.
Step seven: Tune the sound, not just the feel. Sound is half keyboard and half desk. A desk mat absorbs the high-frequency ping that makes a cheap board sound cheap, and a couple of layers of painter's tape on the inside of the case is the cheapest fix in the hobby for a hollow, echoey board. Do the mat first. It is free if you already own one, and it changes more than the tape does.
Step eight: Apply the two-week rule. Type on it daily for two weeks before you decide anything. If you stop noticing the keyboard, it is good. If you are still fighting the layer map on day twelve, change the layer map. Do not buy new switches to fix a layout problem.
What to skip
Skip the aftermarket keycap set in month one. A cap set that costs more than the board is the classic budget mistake, and the stock caps on both of these boards are not the thing holding them back.
Skip the switch swap until you have run the two-week rule. You cannot diagnose a switch problem on a board whose stabilizers are still rattling, because you will blame the wrong part.
Skip the RGB setup until the end. It is the most fun and the least important step, and on any board where the software wants an account to change a color, that is a sign to leave the defaults alone.
What this all costs
Both boards sit in the budget tier, so the money question is not which one is cheaper, it is what you add on top. A keycap puller and a switch puller are the only tools you strictly need, and most boards ship with at least one of them. Dielectric grease is a few dollars and lasts for years. A desk mat is the one purchase that pays off immediately.
The honest math: a budget board with a proper stabilizer tune sounds and feels closer to boards costing several times more than the price gap suggests. That is the entire argument for buying in this tier and doing the work yourself.
The rest is time. An hour for the initial setup, a few minutes for the rattle check, and two weeks of daily typing to know whether you got it right. That hour is the difference between a board that sits in a drawer and a board you reach for every morning without thinking about it.
That is the job. Pick your layout, run the steps, and let the keyboard disappear.