A budget mechanical keyboard setup is not really about the board you buy. It is about the hour you spend after the box arrives, and the order you do things in. I have watched people spend real money on a board, hate it for a week, and buy another one, when the actual problem was a rattly stabilizer and a switch they never consciously chose.
Here is the sequence I run on a new board: check the stabilizers before anything else, decide whether the stock switches stay, set the layout, then chase the sound. Get the order right and a cheap board will out-type an expensive one. Get it wrong and you will blame the keyboard for something you did.
This is written for someone who just unboxed a first or second mechanical board and wants it to feel good for eight hours of typing a day, not for someone collecting group buys.
Why you should trust me
I have been building and tuning mechanical boards for years, long enough that my keycap shelf is a negotiated settlement with my roommate. I write code on whatever board is on my desk for eight hours a day, and the lesson that keeps repeating is that the difference between a keyboard that disappears under your fingers and one that needles you all afternoon is almost never the price. It is the stabilizers, the switch weight, and whether the case rings when you hit the spacebar.
I do not review anything from an unboxing. A board has not earned an opinion until it has survived a full work week of real typing, and a stabilizer has not been judged until I have heard it with the keycap on and with the keycap off. If a board cannot survive a Monday through Friday, it does not matter how good it sounded for ten minutes.
How I picked and how I tested
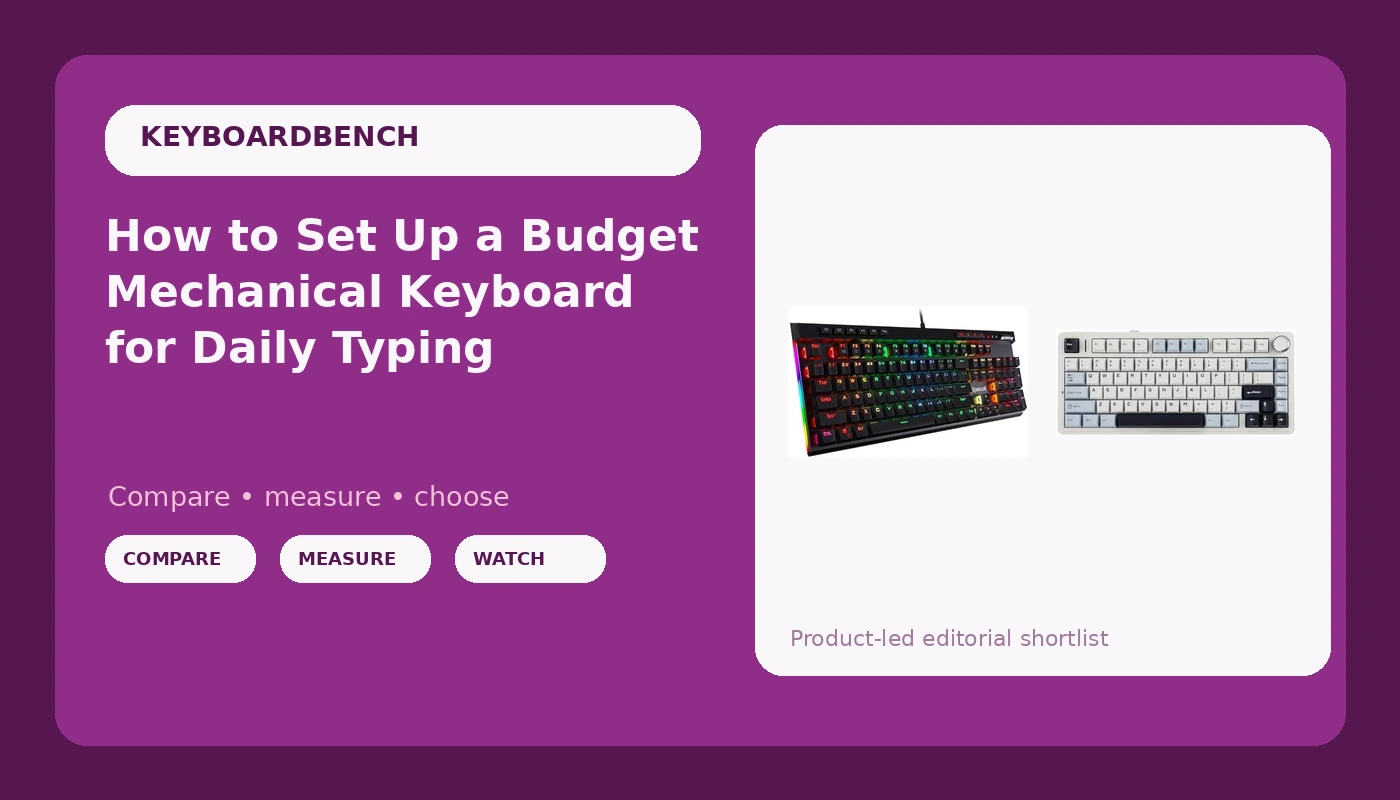
The two boards below are not the only keyboards worth owning. They are the two shapes most people are actually choosing between in 2026, and they bracket the decision cleanly. One is a full-size wired board with dedicated macro keys and a media wheel. The other is a compact wireless board with a gasket mount and hot-swap sockets. Almost every question I get from a beginner lands somewhere between those two.
The process I run is the same on both. I press every long key off center and listen for rattle before I look at anything else. I compare the stock switches against a known linear and a known tactile with my eyes closed, because what a switch is called matters less than what your fingers report. Then I type on it for a week and notice whether I stop thinking about the keyboard.
The numbers that matter here are not on a spec sheet. Rattle is a sound, not a measurement. Switch weight is a preference, not a ranking. Hot-swap is the one feature I treat as non-negotiable, because soldering should be a hobby and never a requirement. Everything else is tuning.
The two boards I would start with
Both of these will get you typing today. The question is which shape fits the desk you actually have.
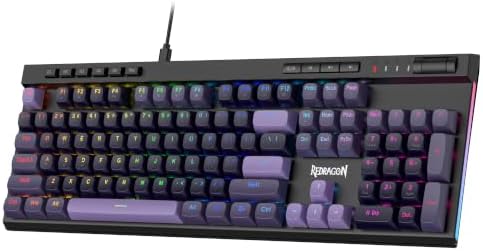
Wired pick: Redragon K580 Wired RGB Mechanical Gaming Keyboard, Macro Key & Media Wheel
 Visit on Amazon →
This is the full-size, wired, desk-bound answer. You get a number pad, you get a dedicated macro key, and you get a media wheel, which sounds like a small thing until you have used a physical volume roller for a week and then have to go back to a keyboard shortcut. The RGB is there if you want it and off if you do not.
The reason to pick this one is the layout, not the badge. If you work in a spreadsheet, a CAD tool, or anything with a numpad workflow, a 75 percent board will make you miserable and you will not admit it for a month. The macro key and the wheel are the two features people dismiss as gamer nonsense and then miss badly when they move to a smaller board.
Flaws but not dealbreakers: It is wired, so the cable decides where your desk lives. Gaming-brand budget boards are also exactly where cheap stabilizers show up, which is why the first section of the workflow below exists. Check the long keys before you judge the rest of the board.
Anyone who needs a numpad, wants macro keys, and never moves the keyboard off the desk should start here.
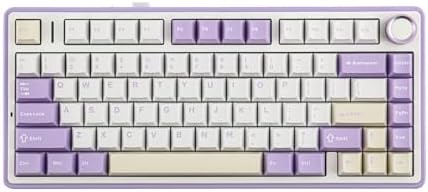
Wireless pick: EPOMAKER x Aula F75 Gasket Mechanical Keyboard, 75% Wireless Hot Swappable Gaming Keyboard with Five-Layer Padding&Knob, BT/2.4GHz/USB-C, RGB (Light Blue, LEOBOG Reaper Switch)
 Visit on Amazon →
This is the compact, wireless, hot-swap answer, and it is the board I would hand to a typist who wants to learn what tuning feels like. The 75 percent layout keeps the function row and the arrow keys and drops only the numpad, which is the right trade for most people. The knob covers volume and whatever else you assign it. Three connection modes, Bluetooth, 2.4GHz, and USB-C, mean you can move it between a laptop and a desktop without a dongle dance.
The gasket mount and the five layers of padding are the parts that matter for feel and sound. A gasket-mounted board flexes slightly under your fingers instead of sitting on hard standoffs, and the padding stack is what keeps a plastic case from sounding hollow. The LEOBOG Reaper switch is the stock option in this colorway, and the hot-swap sockets mean you are not married to it.
Flaws but not dealbreakers: A 75 percent layout costs you the numpad, and wireless costs you a charging habit. Battery life is a feature until it dies mid-sentence, so decide now whether you will run 2.4GHz at the desk and keep a USB-C cable within reach. The compact case also puts the stabilizers closer to your ear, which makes a bad set more obvious, not less.
Anyone who types more than they game, wants to try different switches without soldering, and moves between two machines should look here first.
The actual tuning workflow
This works on any hot-swap board and most soldered ones. Do it in this order. Doing step five before step one is how people end up with a board that sounds fine and still feels bad.
Step one: Check the stabilizers. This is the first thing, always. Pull a keycap off the spacebar and press the key at the far left and far right edges, not the middle. You are listening for a metallic ping or a loose rattle on the upstroke. If you hear it, stop and fix it before you do anything else, because every other improvement will be buried under that noise.
Step two: Fix the rattle. The cheap fix is lube on the stabilizer wire and the housing where the wire contacts it. The better fix is a replacement stabilizer set, which is one of the highest-value upgrades in the hobby. A tuned stabilizer set is the single biggest reason a cheap board can feel like an expensive one, and it is the first place budget boards save money.
Step three: Decide on the switches. Linear, tactile, or clicky is a personal question and nobody can answer it for you. If you type all day, a lighter linear or a mild tactile is usually the safer bet. If you want feedback on every keystroke, go tactile. Clicky switches are for people who do not share an office. Because both boards above are hot-swap, this is a ten-minute experiment, not a commitment.
Step four: Look at the keycaps. Keycap quality tells you more about a board than the case material does. Cheap caps feel thin, sound hollow, and shine up fast. If the stock caps feel slippery or tinny, a modest set in the profile you like will change the board more than a new case ever would.
Step five: Chase the sound, in order. Put a desk mat under the board first, because half of what you hear is the desk, not the keyboard. If it still sounds hollow, add foam inside the case. If it rings, a layer of tape on the back of the PCB is the classic fix. Do these one at a time so you know which one worked.
Step six: Set the layout and the firmware. Remap the keys you actually miss. Put the macro key or the knob to work on something you do fifty times a day. If the configuration software demands an account before it will let you change the backlight, that is a reason to skip the software entirely and set the board up as a plain keyboard.
Step seven: Set up wireless properly if you went that route. Use 2.4GHz when you are at the desk and Bluetooth when you are away from it. Charge on a schedule rather than when the board complains. If you get dropouts, move the receiver off the back of the case and onto the desk with an extension, because a metal case between the radio and the dongle is the usual culprit.
Step eight: Type on it for a week before you decide anything. This is the step everyone skips. If you stop noticing the keyboard by Thursday, it is good. If you are still noticing it on Friday, the problem is usually the switch weight, not the board.
Common problems and how to fix them
The spacebar rattles and the other keys are fine. That is a stabilizer problem, not a keyboard problem. Lube first, replace if that does not hold. It is the most common complaint about budget boards and the most fixable.
It sounds hollow. Add case foam, then a desk mat, in that order. Sound is half keyboard and half desk, so try it on a different surface before you buy anything.
It feels heavy by the end of the day. Your switches are too stiff for eight hours of typing. This is exactly why hot-swap matters. A lighter spring weight will do more for your hands than any other change on this list.
Wireless drops out or the battery dies at the worst time. Move the receiver, then decide on a charging routine. If neither helps, run it wired over USB-C and treat wireless as a bonus.
The software wants an account. Do not give it one. Set the board up once, save the profile if the board supports onboard memory, and leave the software uninstalled.
What this all costs
Prices on both boards move around, so check the current Amazon price at the links above rather than trusting a number in a guide. What does not move is the time math, and the time is where the value is.
- Step one and two, the stabilizer check and fix: about 30 minutes, and it is the highest-return half hour in the hobby.
- Step three, a switch swap on a hot-swap board: 15 minutes, no soldering.
- Step five, sound tuning: 20 minutes with a desk mat and whatever foam you have.
- Step eight, the week of typing: free, and it is the only test that counts.
Add it up and you are looking at roughly an hour of work to turn a budget board into something you genuinely like typing on. The alternative is buying a second board and repeating the same problems on a new case.
Do the stabilizers first. Do the switches second. Give it a week before you form an opinion. That is the whole job, and your keyboard was built to be tuned.